Quick Tomato Sauce for Pasta
This is a quick, and also very easy, recipe with lots of options and modifications available. It is particularly nice with leftover grilled sausages or roast chicken. If you always have the staples on hand, you will always have an easy dinner to fall back on.
1 tbsp Extra Virgin Olive Oil
1 med brown onion, chopped
2- 3 med garlic cloves, sliced
1 cup mushrooms, sliced (optional)
1 cup zucchini, sliced thin, or other vegetable, cut in bite size pieces to substitute
1 can diced tomatoes
1/4 -1/2 cup white wine
1/4 cup low sodium chicken broth
1 tsp capers, drained
1/2 tsp chili pepper flakes
1 tsp dried oregano
1/4 tsp dried rosemary (I use the Fresh As brand)
Salt & Pepper
250 grams short pasta, such as Fusilli or Penne, cooked to package directions and drained
grated Parmesan, to taste
1. Heat olive oil in a large non-stick pan over medium high heat until shimmering. Add onions and garlic and saute until soft
2. Add mushrooms (if using), and saute until they begin to soften and most of their moisture has cooked off. (If using a longer cooking vegetable instead of zucchini, add now and saute for 1-2 minutes, combining well with other ingredients)
3. Add 1/4 cup white wine, bring to boil while scraping the pan, and cook down by half
4. Add seasoning (except salt and pepper), combine well and cook for 1 minute
5. Add tomatoes and capers, cook for 1 minute while stirring to combine all ingredients
6. Add broth and more wine if needed, bring to a boil then lower heat and simmer low, uncovered, for 10 – 12 minutes
7. Add zucchini (if using), cover and cook until done
8. Add salt and pepper to taste
9. Optional: Add leftover grilled sausage slices, roast chicken pieces or smoked fish, cooked shrimp, etc, for the last few minutes until warm
10. Add cooked pasta to the pan and stir through well to combine with sauce and other ingredients
11. Plate up and grate Parmesan over to taste
Serves 2 – 4
Home Renovations – Tips on Surviving the Process
As a designer, I always get the same questions: Where do I start? Do I need an Architect? An Engineer? But especially, How do I survive the process? Here are some answers to common questions from people considering a renovation project
HOW DO I SURVIVE THE PROCESS?
Move out! Of course, this is something that most of us can’t afford to do, even knowing that with any renovation there will be considerable inconvenience But there are some things you can do to ease the process. Designate rules of the house for the workers: which bathroom to use, which door to come in and out of, where to dump trash. Make sure they clean the job site daily. Come to an agreement on starting and quitting times, including any weekend work days. Whatever you do, the process will be difficult. But it is a short term inconvenience for a long term benefit. (And who knows – you may even get to like the radio station they listen to!)
BUT WON’T MY HOUSE BE A HUGE MESS?
Yes, it will, but there are things that can be done to cut down on the mess. Move everything out of the areas to be worked on. Cover all furniture in the vicinity or transportation path of construction. Make sure your builder adequately protects flooring and furniture. And confirm that they are using good dust seal materials on all doorways leading to the work area. Dust is the absolute worst part of this whole process and whatever you do, expect to be cleaning it away for months after the project is completed. However, if you have followed the steps above, particularly insuring that the builder has properly sealed all work areas, you will have done everything possible to minimise the amount of cleanup.
MY KITCHEN IS TORN UP, HOW DO I FEED MY FAMILY?
The most difficult home renovation to get through is the kitchen. You can expect to have your appliances out of commission for a good long while, 4 weeks if you are lucky, but 8 weeks or more depending on the size and complexity of your project. Takeaways or eating out every night during this time can not only break your budget, but will ruin your health and your waistline! So here are some survival tips.
If you can schedule the project during months when the weather is conducive to outdoor cooking, this would be ideal. Invest in a great barbecue, if you don’t already have one, along with a great bbq cookbook. You can make just about anything on the barbie, even pizza and dessert! But any time of the year, set aside a room in the house to be your temporary kitchen. Have the builders move your fridge in here, along with your microwave, toaster and any other small electrical appliances. If it’s not bbq weather and you have a wood burning fireplace, be adventurous and experiment with roasting some sausages or other meats there. Unless you have a large, useful laundry sink for washing dishes, splurge on disposable dishes and cutlery for the duration, as trying to washes dishes in a bathroom sink or tub will get very old, very quickly. If you have a large freezer, the weeks ahead, start preparing dishes that are suitable for freezing in large quantities, and then store in aluminium containers in meal size portions. Whatever you do, it will be inconvenient, but you can minimise the pain and try to have some fun in the process!
I DON’T HAVE TIME, WHO WILL MANAGE THE WORK?
A professional designer can be a very important addition to your renovation team. And one of my specialties is Project Management. In addition to producing all of the drawings and helping you source your products, I can also help run the process from beginning to end. And at a fraction of the cost you would be charged by an architect or specialist project manager!
In addition, to helping you narrow down the dizzying array of products choices and saving you money by passing along trade discounts, I receive all products you purchase through me, handle any problems that may arise and assure that products are available when needed for installation.
For a busy person trying to live through a major renovation project, such as a new Kitchen or Master bathroom, it helps to have a coordinator. I speak both yours and the contractor’s language and am therefore ideally suited to help you manage the fine details that will keep the project running smoothly and on schedule. With this kind of help, you can concentrate on taking care of your family, while I manage your project so that it runs smoothly and on schedule!
Home Renovations – How to Get Started
As a designer, I always get the same questions: Where do I start? Do I need an Architect? An Engineer? What about building consents? What about Builders? How do I survive the process? Here are some answers to common questions from people considering a renovation project.
HOW DO I GET STARTED?
The first step for even the smallest project is to have a plan. This plan should be very detailed and written down, with drawings and illustrations as needed. Try to think through all of the smallest details to address on your plan. For example, in addition to choose light fixtures, think about switches and outlets. Where will the light switches go, do you want them turned on in one place or two, and which lights will be controlled by which switches? What about electrical outlets, how many do you need and where will they go? What style and colour should they be? What about trim, for doors, windows, baseboards and ceilings? We tend to think about the big things, but forget about the multitude of small questions that will arise during construction. If you are doing your own designs and drawings, make sure to take very accurate measurements, and then re-check everything at least two more times. Being off by even a few millimeters when you order products can create major problems and huge unexpected expenses.
For all products that require installation, purchase and take delivery of everything before work begins. For items that are too large or impractical to have delivered in advance, have them pre-purchased and stored for you, ready for delivery on request. The biggest delay in building projects are caused by products not being on site as required. If you have everything lined up and ready to go before starting, your project will proceed smoothly and be finished in the minimum timeframe. And confirm that your builder follows the same practice. If you have done your part, you don’t wan things slowed down because he hasn’t done his.
HOW DO I CHOOSE A BUILDER?
The best way to find a reliable builder is on referral from someone you trust. Direct experience from someone who has worked with a builder is a good starting point. Ask for names from any other professionals you are working with, such as your architect or designer, or vendors you are buying products through. But regardless who makes the recommendation, be sure to check references. Ask for contact details of former clients and completed projects. Call a few and ask some important questions. Was the builder on time? Did he run a clean jobsite? Did he come in on budget? How was his work crew to get along with? Ask to look at examples of work done on projects similar to yours. When inspecting these projects, make a point of looking past the shiny new fixtures and fittings to try and ascertain the overall quality of the workmanship. Clues to look for are smooth walls, clean cuts on any timber finish work, level installation of work done by the builder. Be sure to have a friendly chat with the homeowner, asking important questions about their satisfaction with the process and the results. Get quotes from 2 – 3 different builders, making sure that the quotes include good details and explanations on the scope of work being quoted. But be careful not to hire on price alone. The least expensive may not be the worst builder, just as the most expensive won’t guarantee the best outcome. Do all of this research with due diligence. But in the end, go with your gut. All other things being equal, make sure the builder and his employees are people you feel comfortable with. You will be spending a lot of time together!
WHAT SHOULD I LOOK FOR BEFORE SIGNING CONTRACTS?
With completed plans and final decisions on all your product choices, you will be in a position to get the most accurate quotes from all of your vendors, including the builder, sub contractors and cabinet maker. You will have determined the most accurate budget possible, but always factor in at least an additional 10% for the unexpected, particularly when you are opening walls and getting into foundations. If your builder doesn’t advise this himself, that’s a red flag. Any quotes from builders or subs should include a detailed description of work to be performed, a payment schedule and guarantees. Invoices for product purchases should clearly specify model numbers and description, state return and warranty policies, along with the process for resolving any errors. A small mistake can lead to major headaches and difficulties if it is not clear who is at fault and who will be financially responsible for resolution. Then make sure that you follow these policies. If a product purchase invoice states that any errors must be reported within a certain time period, be sure these policies are followed to the letter, either by you or whoever has been designated as project manager.
WHAT IF I WANT SOME HELP?
A professional designer can be a very important addition to your renovation team. And of course I will recommend myself as your best choice! I can give you all the information you will need to proceed, including all necessary drawings and builder referrals. As a qualified and experienced design specialist, I can often take the place of an architect, particularly on interior renovations, and for a fraction of the cost! I will create a plan, procure building consents and produce all design and technical drawings to complete the installation, including specialty items such as mechanical and electrical plans.
In addition, I can help you narrow down the dizzying array of products choices and will save you money by passing along trade discounts. I will help you weigh the relative merits of different product lines, and save you money by suggesting products that offer the best value and durability. And as a designer, I have sources, and product choices, that are not available to the general public.
For a busy working person trying to live through a major renovation project, such as a new Kitchen or Master bathroom, it helps to have a coordinator. Designers speak both yours and the contractor’s language and are therefore ideally suited to help you manage the fine details that will keep the project running smoothly and on schedule.
Banana Bread
I have been making, and perfecting, this recipe for close to 15 years. It’s really, really good, everyone says so, and comes out perfect every time. As long as you follow my little tips , and get to know your oven. The basis for my recipe is from Ethan Becker’s 1997 re-issue of his mother’s iconic “Joy of Cooking”. With my tweaks and improvements, it is still the best of over a dozen other recipes I have tried. Although this is called a bread, it is quite sweet, and perfect for breakfast with tea or coffee. Enjoy!
Tip #1 – do not over mix the batter. Where the instructions say “just until combined” be sure to do just that
Tip #2 – use the ripest possible bananas, they can’t be too ripe. The riper the bananas, the sweeter and moister the finished bread. And do not use pre-frozen bananas – they get too watery and will make the finished bread too wet
Tip #3 – Follow the order of mixing and adding ingredients exactly. It does make a difference to the finished texture
Tip #4 – As simple as the process and the instructions are, the little things do matter. Such as pre-toasting the walnuts, and using the exact quantities of ingredients. Always level the dry ingredients in your measuring cups and spoons, and use dry measure, not wet measure cups (as a rule, glass or clear measuring cups are for liquids, metal or plastic measuring cups are for dry ingredients. Spoons are for either)
Tip #5 – When toasting walnuts, be careful they are not overdone. In a 175 C oven, spread whole walnuts in one layer on a baking tray, then toast until they are fragrant and shiny. As soon as the kitchen begins to fill with the smell, get them out of the oven. Then break, or chop them into small pieces
Tip #6 – If you have the option on your oven, do NOT use the fan/convection setting. Use “Classic Bake” or non fan operated function only
Begin with all ingredients at room temperature. Position a rack in the center of the oven and set to 175 C. Grease an 8 1/2 x 4 1/2 inch (215 x 115 mm or close to) loaf pan with butter and set aside.
1 1/2 cups high grade flour (not self-rising)
3/4 teaspoon salt
1/2 teaspoon baking soda
1/4 teaspoon baking powder
80 g unsalted butter
2/3 cup sugar
2 large (#7) eggs
1 teaspoon vanilla
2 large, or 3 small, ripe bananas
1 cup walnuts, toasted and chopped
1. Combine all dry ingredients in a bowl, mix together and set aside
2. In a separate bowl, mash bananas until there are no visible lumps, add walnuts on top and set aside
3. In a small bowl, very lightly beat the eggs, mix in the vanilla and set aside
4. In a large bowl, beat the butter and sugar until lightened in colour and texture (a stand mixer works best, but a hand mixer, or beating by hand will work just as well)
5. Slowly add the dry ingredients and beat until well combined and grainy
6. Gradually beat in the eggs and vanilla until just combined, do not over mix
7. Fold in the bananas and walnuts until just combined, do not over mix
8. Scrape the batter into the pan, spreading the top so that it is flat and even
9. Bake for 50 – 60 minutes. It is done when a toothpick inserted in the center comes out clean. The top will rise and split, this is normal
Let cool on a rack, in the pan, for 10 minutes. Then shake out of the pan, turn right side up, and allow to cool completely on the rack. All baked goods are best on the first day, but tightly wrapped in plastic wrap, at room temperature, this bread will last well for 3 – 4 days.
Favorite Food and Recipe Links
I am mostly a cookbook person, with upwards of 125 at last count. I prefer having a solid book in my hand, preferably with gorgeous photos, to searching online for recipes. That said, there are a few that I frequent, along with food blogs that include recipes. Here then, a list of my personal favorites:
Cooks Illustrated The best website for guaranteed to be perfect recipes! Cooks Illustrated is part of the America’s Test Kitchen family, which started out as cookbooks. Not surprising then that their books also rank among my favorites. This is a subscription website, with a few free recipes, but you will have to sign up to access the huge mother load. Well worth it, for the recipes and so much more available online. Including a truly revolutionary, fool proof pie dough!!
Epicurious one of the first and still one of the best
Dorie Greenspan my favorite food blog, including recipes. Dorie is the queen of baking, in fact, her book “Baking” taught me how to do just that and led to a few dozen more books and a minor obsession. Her recipes are foolproof, her writing is always entertaining, her recommendations to be relied upon, and she even share the occasional savory recipe
Cafe Fernando a food blog like no other. Entertaining, educational and always fascinating, not to mention the name tells you nothing about the content. I won’t tell you more, just check it out
Nick Malgieri Nick is another highly regarded baking master, with down to earth and easily accessible recipes
NOTE: if you come across the ingredient “corn syrup” called for in any of the American recipes, particularly when making cake frosting, DO NOT try substituting! In Auckland, you can find both light and dark corn syrup at Martha’s Backyard on Lunn Avenue in Mt Wellington. She also has Crisco shortening, best for the pie recipes (NZ shortening is different and may alter the results)
Julia Child because she is incomparable, need I say more? The Baking with Julia series was amazing and produced a wonderful cookbook, co-authored by Dorie Greenspan
Mexican Specialties probably the best Mexican food in Auckland (though I hear there are some new contenders on the horizon), with recipes coming soon to the website. And their little store will have most of the ingredients needed for any of your Latin American recipes
Chow and Chowhound all things food and foodie, with an Australia/New Zealand forum that you can sign up for here
Millys Kitchen the best kitchen store of course, and now they have recipes online too. I prefer the huge Parnell warehouse location, though the Ponsonby store has it’s charm
Foodie all things food and foodie New Zealand with a great newsletter that you can subscribe to
Foodlovers a lot like the previous listing, also with a newsletter and loads of recipes and forums
Dineout not recipes, at least not usually, but an invaluable resource for any foodie. A wealth of great information on restaurants and related topics, love their forums too!
Dish Magazine and last, but certainly not least, if you can buy only one food magazine, this has got to be it! I have tried them all, and still do on occasion but whether Kiwi, Aussie or American, there is no comparing to Dish. The best recipes hands down, always perfect the first time.
I hope you have enjoyed my list and have found some new and enlightening resources.
Happy eating! And Happy Holidays to all!
To comment (until we get all this programming sorted) please go to our facebook page here
Musings on Colour – A Personal Perspective
Anyone who knows me will have heard me complain about white, or even worse!, beige walls. This is not a new thing. Even before I became an interior designer, colour in my home environment was a very important thing. In a long ago rented apartment, I painted the cabinet doors and drawer faces of my white kitchen a lovely robin’s egg blue. A lot of work for an apartment I lived in for less than 2 years, but it made me smile every time I walked into that room.
If you are reading this, then you already know that I am from San Francisco, living in Auckland, coming on three years now. It’s a transition, some good, some more difficult. I deal with it. But I did not expect is to be so confused about colour! It was something I didn’t think about at all until last year when we bought our house. A big house, two floors, lots of wall space. Painting would not begin right away, I had some time. But that time is drawing near. As I work out all the details (just in my head, soon to go on paper), I have been thinking about what colours we will paint the walls. And here I am not only stumped, but very upset about being stumped!
For me, colour has always been instinctual, whether in the clothes I wear, the choice of toe nail polish, or paint for the walls of my home. Especially those wall colours. I have always known, in every instance, what colours I wanted and where. The exact shades were down to sorting through paint chips and trying the choices out in different light. But I have always had a good sense going in whether this wall would be a red, while that one a yellow, and this one a green and so on. But since moving into this house, I have had no sense at all, and that has been weighing on me. Keeping me awake at night. Really. And that indecision has had me wondering – why don’t I know, the way I always just know?
In the article about Home Magazine’s 2011 Home of the Year, the writer says, “Views are the blessing and the curse of many New Zealand homes. Our remarkable landscapes command attention, but many of our homes cower mute and inexpressive in response”. How very true, and this is the realisation I had finally come to. The writer is referring to architecture, but it applies as well to interiors. We have so much of the outside inside, with our fully detached homes and big windows on all sides, that the outside always has to be considered. Wall colours, even window coverings, are frames for views that are like huge paintings on our walls.
In the Northern Hemisphere, even in sunny California, most of the homes are all about the indoors. There is just too much world out there that we want to get away from. All but the very rich have views of concrete sidewalks chock-a-block with parked cars, and ugly rooftops. We are packed in on small sections, in cities like San Francisco, houses are up against each other, so that windows are only front and back, not on the sides, and an occasional skylight if one is lucky.
But here, it’s also about the light, which is so very different, that harsh, bright southern light that intensifies every colour. Subtle warm shades just won’t do for framing those bright green trees and intense blue sky. In New Zealand, especially North Island, and especially Auckland, with our water views all around, and green, green, green spaces, it will be about how I can create a unique interior that lives in harmony with the exterior. Stayed tuned for the results. Who knew that even paint colours would be such a journey?
A Better Window Covering
Don’t you just love Before and Afters? I do. But in the magazines you see a small black and white “before” photo followed by many glamorous “after” photos. It always looks like the room has been made extra messy, or the model has just rolled out of bed after a rough night! I will be posting before and afters as I begin the process of renovating the big house we bought last year. But I promise not to mess up the rooms or be photographed as I roll out of bed! And if I can manage not to forget before the sledgehammers go to work, I will take enough detailed before shots so that the afters make sense.
So here, entry number one in the renovation chronicles. A very small one I admit, not a renovation at all. But this small thing has made a big difference in elevating the first impression of our home, the entry.
Our house, in a leafy suburb of wide residential streets in central Auckland, has huge windows all around. Especially in the public rooms. Wide sliding doors on two sides (soon to be three) open onto decks. Long and, in many places also tall, windows feature in every room. There is even a second stack of long windows along the front of the house. This amount of glass, and view of the outdoors, will affect every aspect of my interior design. It has already contributed to my confusion about paint colours, but more on that in a later post.
While I try to be patient about the design process, what needed quick attention were the horrible, ancient aluminium Venetians on every window, big, small or sliding. Some have been replaced with beautiful, off white painted Venetians, wide 60mm slats, which look so elegant. Venetians gave me not only the look I prefer, more of a warm, furniture look than roller blinds, but also the function I need, the ability to adjust privacy, light and air flow. We have nice, deep recesses at all windows and sliding doors. Except at the entry. Here was a challenge!
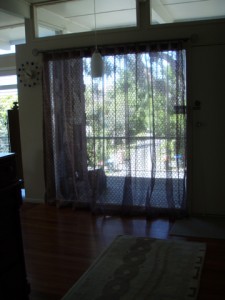
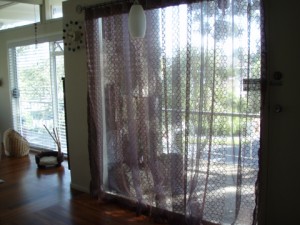
Our house is built in classic mid-century modern style, very open plan, with the entry, lounge, and dining area all flowing into one big space without visual obstruction. So all the blinds are the same. At the entry, just next to the front door, there is a big window, a single large glass panel. But, no recess. If I used the same blinds here, they would be sticking out into the room, into the walkway, and would just look wrong. Solution? Well, curtains of course. But I wanted the light and the openness, so I went for sheers. And not just any plain sheer, no, these are gorgeous!
BEFORE:
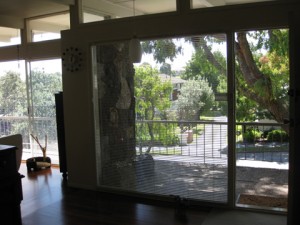

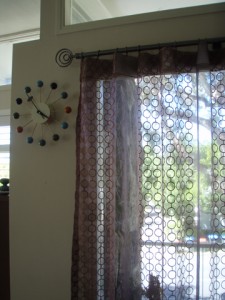
And never forgetting the function and the practical, the window has had a new tinted film applied. This film gives 90% UV protection so the fabric won’t fade, and is mirrored on the outside. So now I can have my view always, while maintaining privacy. And it looks so nice ;-)
The Kitchen Corner
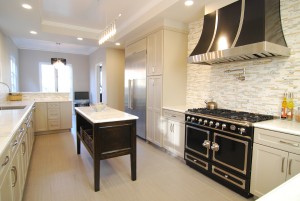
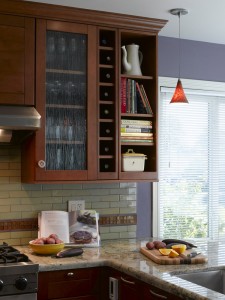
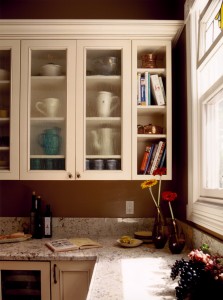
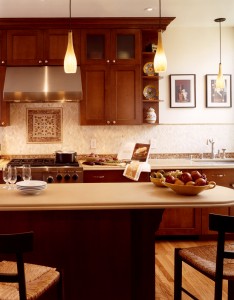
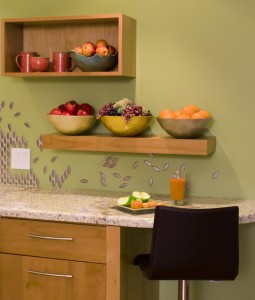
One of my favorite design tricks, and a feature that pops up again and again in my kitchen designs, is to treat an end corner as a special area. Most kitchen designs have open sides, where a run of cabinets will start at a wall but then the end opens to a room. Sometimes there is a walkway there, either heading down a hall or into another room. Sometimes there is a window at the end so the cabinets don’t head all the way to the wall. Sometimes the lower cabinets continue along one side while the uppers stop. Whatever the room or cabinet layout, I always try to finish an end with something interesting. And interesting to me usually means open shelves where the owner can make a personal statement. Some examples:
Stylish Range Cookers
A true classic from France, La Cornue has been making high end, fabulous cookers for over 100 years. One of the most sought ofter, luxury stoves in Europe and the US, FL Bone of Auckland has added this to their amazing line of beautiful and hard working stoves from the UK, such as AGA, the standard in olde English homes for centuries
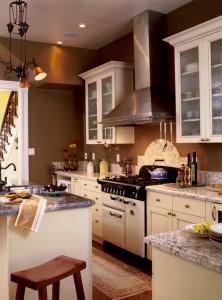
And I speak from personal experience. Last year I needed to buy a new cooker. The top end US brands, Viking and Wolf, while available here, are prohibitively expensive. And although I have specified them dozens of times for clients, the heavy duty commercial stainless look is not to my personal taste. So I did a massive amount of research to familiarise myself with locally available brands, like Ilve, Smeg, Award and others. I looked at performance and reliability, compared that to cost – value for the dollar – and the look of the appliance. I am very particular about the performance of my gadgets, big and small, and I cook a lot. I also wanted this to be a lifetime purchase, so I needed to get it right.
My research took me to online user review sites, mostly Australian and UK based, mixed in Consumer’s NZ product testing, with manufacturer claims of performance. And I talked to loads of people, including salespeople, kitchen designers and end users of different brands.
All of my research led to one clear conclusion and I became the proud owner of a Falcon Rangemaster Professional+FX in Ivory. And I love it! It will be the starting point for my new kitchen design and I am sure there will be a lot more said about it in future blog posts. For now, if you are thinking of a new range cooker, get yourself down to FL Bone and check them out. My stove cost less than the mid-line Smeg, much less than any model Ilve and I am very confident from all of my research that it performs better and will last longer.


